
Anyone who has a patio will tell you that they couldn’t live without this outdoor space. You can save money and customize your backyard by building a paver patio. If you haven’t built anything from scratch, you may not want to try this project. However, if you’re a DIY expert, building a paver patio just makes sense.
How to Build a Patio: Tools and Materials You Need to Build Your Patio
As you know, you need to get your tools and materials ready. Here’s a list to get you started:
In tools, you’ll need:
- 4’ level
- Broom
- Circular saw with wood and concrete blades
- Clamps
- Garden hose with a nozzle
- Garden rake
- Hand tamper
- Line level
- Rubber mallet
- A shovel
- Speed square
- Tape measure
- Tow-behind cart
- Utility knife
- Wheelbarrow.
The experts suggest that you rent rather than buy a plate compactor from your favorite big box store.
Next, you need the materials for building a paver patio:
- 1” outside diameter PVC pipes
- 2” x 4” board
- Exterior wood screws
- Furring strips
- Landscape fabric or weed barrier with pins
- Paver base
- Patio pavers
- Paver restraints
- Mason twine, also known as mason string
- Paver restraint spikes
- Polymeric or jointing sand.
- Paver or leveling sand
Now it’s time to start building your paver patio.
How to Build a Patio in 7 Steps
Before you begin drawing your patio design, you first need to call 811. You need to know where the utility wires are located before you start digging.
Someone from your local utility company will come to your property and mark the underground wires’ location. You should be fine to start digging if there are no underground utility wires where you plan to build your new patio.
Read more: Learn how to create stripes on your lawn.
Plus, you need to check with your local municipality to see if you need a builder’s permit or other paperwork to build a patio on your property legally.
Now, it’s time to get down and dirty:
- Prep the area where you’ll build your patio. Use marking paint to note the edges of your patio.
Next, hammer wooden stakes outside the edges and attach mason line around the stakes.
You need to decide how high you want your paver patio to be, so you start from your home and move downward to create a slope. A slope will help with drainage and keep water away from your house.
Make a mark at the stakes’ height and tweak the mason line to meet the new slope. You want the slope to drop-off about 1” every 8’.
- Time to dig out the turfgrass and the dirt.
Dig out the turfgrass and earth from the perimeter. Take your measuring tape to inspect your depth with the mason line. Adjust your mason line to correct the slope and depth.
After you’re finished digging out the grass and soil, add 4” of gravel base and about an inch of paver sand to serve as the base before adding the paver stones.
- Time to add the paver base.
You’re getting closer to the finished product. Add a 4” depth of paver base throughout the area. Even out the paver base with your landscape rake. Compact the layers for a solid base.
Use your garden hose and sprinkle water over the paver base. Next, use the plate compactor to press down on the base.
Watch more: Ring in the Spring with a Brinly Attachment!
- Pour and level the paver sand.
Lay metal pipes, such as electrical conduit piping, to form guiding tracks when leveling off the paver sand.
Next, put down the sand over the base. Make sure you add sand between the conduit pipes. Take your wooden slab and drag it across to even the layers of sand.
Remove the pipes and fill in the indentations with paver sand. Keep leveling the sand throughout the rest of the area.
Don’t get yourself cornered, though, or you’ll have to level that area again.
- Adding the pavers.
Your patio is starting to take shape. Start at one corner and lay out the paver stones. You want to work in a triangle from tip to base.
Set the pavers straight down onto the sand and fit them tightly together. Don’t drag the pavers because it’ll make the sand uneven again. Use a rubber mallet, and not your feet, to inlay firmly the pavers in their proper spots.
Keep going with this process until you set all of the pavers into your patio area. You may get to a spot where you need to cut your pavers to fit into smaller spaces. Make sure to mark where you want to the cut first.
- Don’t forget the edging pavers.
You want your patio to have a finished look, so you need to add edging stones along the patio’s perimeter. Secure the edging pavers around the patio’s perimeter that’s exposed. Use landscape nails to fasten the edges into place.
- You’re almost finished with building a paver patio.
Make sure there will be no rain for the next 24 hours before you complete the last steps of building your patio. If there’s no rain in the forecast, finish up your project.
Lightly sprinkle a layer of polymeric sand over the pavers. Next, you want to sweep the sand into the gaps. Then, you use the compactor to compress the sand into the patio’s surface.
For the last steps, add a second layer of polymeric sand over the pavers and sweep it to cover the area. Use the compactor one more time over the pavers to complete the look. Lightly rinse the surface with a hose to set the sand.
Wait 24 hours, and you can use your patio for your next outdoor party!
Please note that the above directions are an overview of building a paver patio. For more in-depth instructions, The Home Depot and Lowe’s have excellent videos to guide you through the paver patio building process.
How to Build a Stone or Brick Patio
You may decide that you don’t want concrete pavers as the base of your patio. Instead, you may want stone or brick as your new patio base.
A flagstone patio brings a sense of class to your backyard. However, it’s more challenging to build a flagstone patio. Check out Handyman Startup’s excellent video to learn how to build a stone patio.
If you want to learn how to build a brick patio, you can count on This Old House to teach you the basics in this video.
Learn more: Check out our lawn care maintenance calendar.
How to Build a Patio Cover
You want your patio to be an extension of your home. And a patio cover helps shelter you and your family from wind, rain, and sun.
You can purchase a patio cover, such as an awning or a canopy. You could build a pergola—but that will only partially protect you from the sun. Yet, it won’t protect you from the rain.
So, you may want a full patio cover or a patio roof to add to your newly built patio. April Wilkerson has a two-part series of building a patio cover on her barn.
Learn how to build a covered patio by yourself after watching her videos, part one, and part two. If you prefer written instructions to learn how to build a covered patio by yourself, visit MyCarpentry.com.
How Much Does It Cost to Build a Patio?
While it’s fun to dream and plan your new patio, you first need to see if the cost to build a patio is in your budget. According to Fixr, the average price to build your patio in 2020 is $4,000 for a 12 x 18 ft. paver patio.
Of course, there will be a low-end and high-end costs to consider when building a patio. On the low end, you’ll pay up to $500, and on the high end, the cost to build a patio could be up to $6,000.
The type of materials you buy, where you live, and how large your patio will be all factor into the final cost of the patio. Flagstone and brick pavers cost more to use while cement pavers are on the average to the low-end of patio building materials.
How Brinly Lawn Care and Garden Attachments Help You Build a Patio
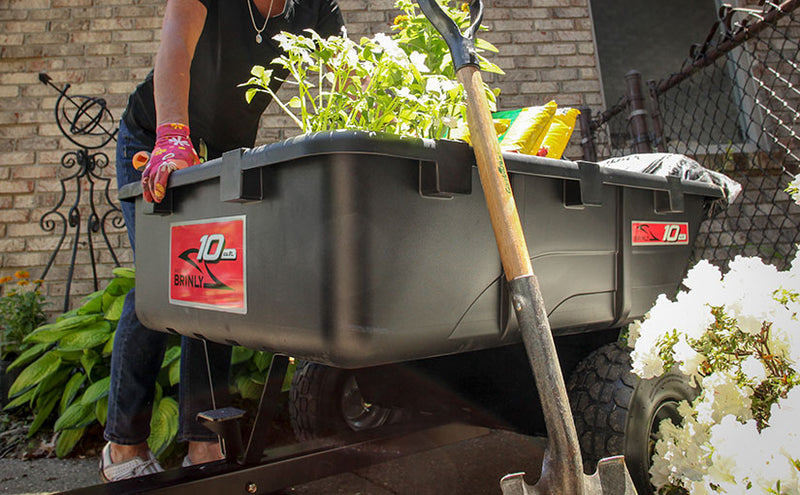
Brinly’s tow-behind carts help you carry your materials and tools to the building site. Our durable tow-behind cart can take pavers, bricks, or flagstone to the spot where you’ll be working.
You can load up your tow-behind cart with your equipment, too, such as your circular saw as well as a broom, landscape rake, and a shovel.
You can find all of your favorite Brinly Lawn Care and Garden Attachments at these online retailers. If you have any questions about your Brinly product, call our customer service today at 877-728-8224 or email us at customerservice@brinly.com.